Personal Note
A part of my way organizing my negatives along with my scanned files is through Metadata and creating EXIF data through a software known as AnalogExif. There are probably other pieces of software out there now they can be better but this fits the bill in terms of incorporating what I need and what to add for each individual file or batched files. It’s simple and easy to use and I recommend it to anyone who wants to keep some form of data towards their imagery. Though the software isn’t currently updating, it’s free and simple to find and download.
What’s EXIF?
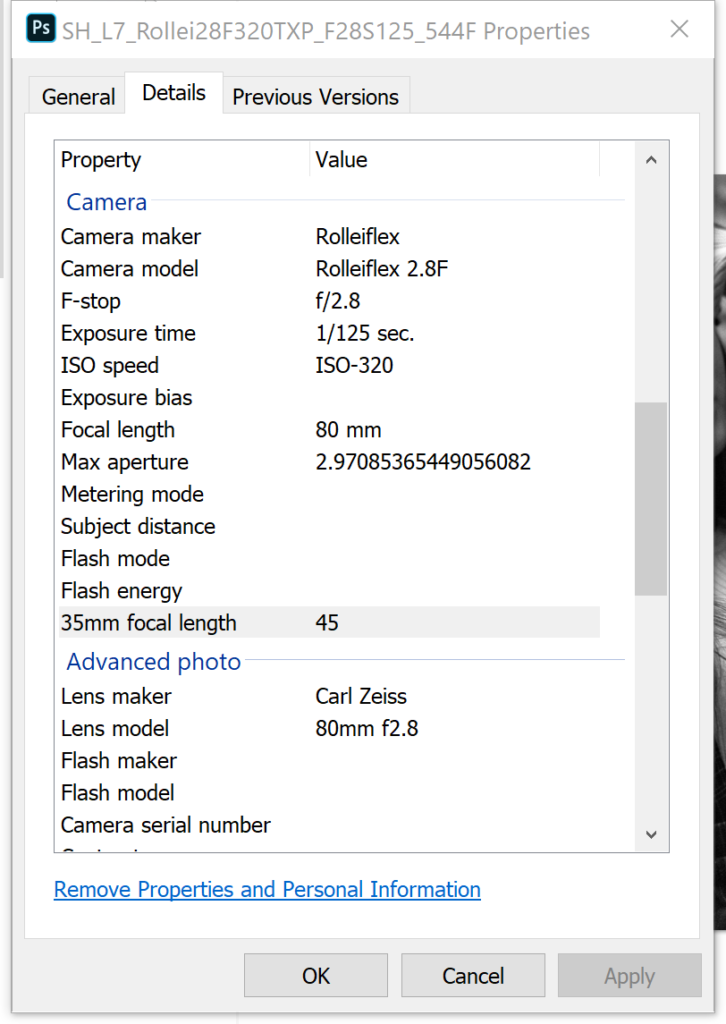
EXIF stands for the exchangeable image file format. Most modern cameras store EXIF data in every photo file they create. EXIF data is metadata, storing the camera’s settings used to create the picture, with the time and date it was created (what you’ve set up within the camera). Metadata editor such as AnalogExif are used for the scanned films and DSC-captured digital images that may not have any metadata embedded, so you can create stored information for these files (or even adjust information if inputted incorrectly).
Why Adding Metadata to your scans?
It’s valuable to add such information to your scans and images so you can refer back to them digitally when you want to remember how you’ve taken the photo. In many ways, I’ve spoken to many different photographers and some may want to see certain examples taken by a certain camera, film, developer, lighting, etc. and through metadata, it helps filter down images I have in my gallery. Storing your images digitally this way, on top of archiving your negatives makes it rather easy to navigate your archives. It really saves a lot of time when you spend a couple of extra minutes using and EXIF software to input pieces of information. Furthermore, I enjoy seeing the technical specs on my site and through Flickr when browsing past photos (where hashtags may not be the forefront of the platform).
AnalogExif Interface
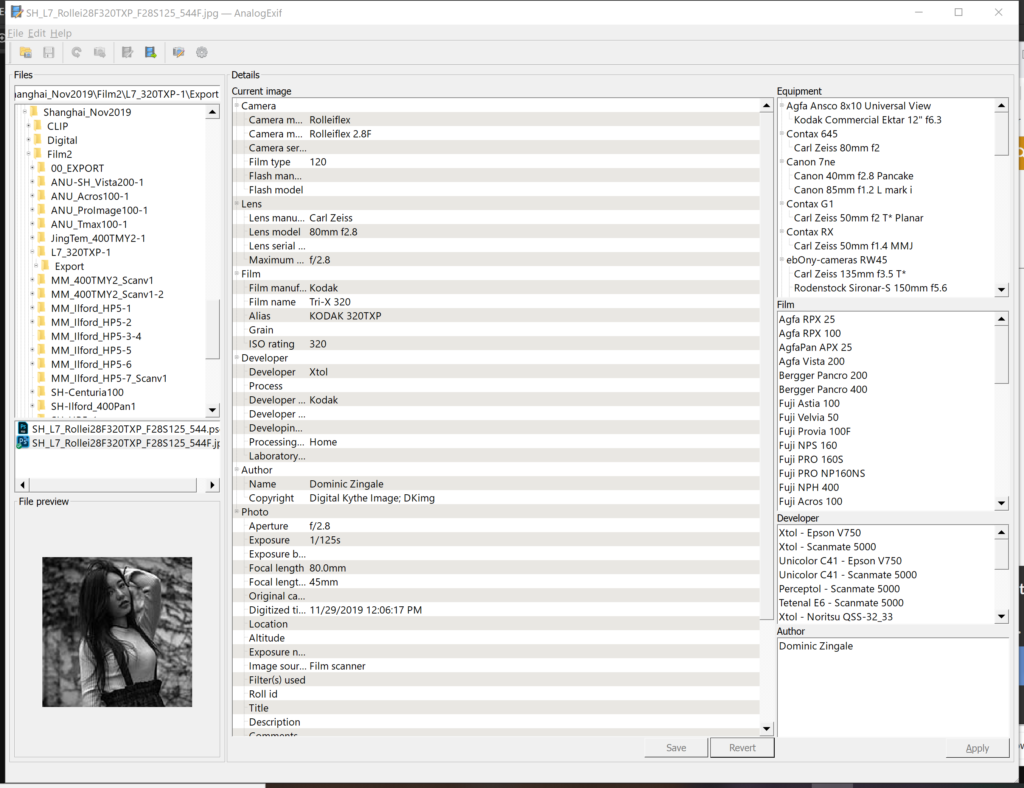
AnalogExif composes of seven (7) main sections of the interface. You have:
- Files: The directory which you can browse and find your images.
- File Preview: The preview of the image you’ve select (typically JPEG/PNGs work for this section; PSD, TIFF, etc., wouldn’t show).
- Details: The entire column dedicated to all the information which can be added to the selected file(s). By default, it’s sectioned with Camera, Lens, Film, Developer, Author, and Photo. Through settings, you can add extra fields and descriptions if you like (though seems like everything I need is there and sufficient).
- Equipment: Where you select all of the camera and lens combinations that you’ve entered
- Film: Where you select any film stock that you’ve entered
- Developer: Where you select any developer that you’ve entered (in this case I added extra fields for the developer, to work hand-in-hand with scanners I’ve used).
- Author: Where you select the name/company you’ve entered.
Tabs to consider
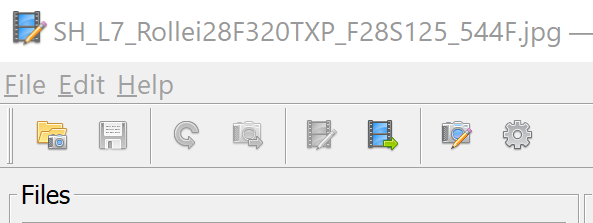
At most you may use the Negative Green Arrow Icon or the Camera Pencil Editing Icon for your day to day use. The Negative Green Arrow Icon gives you the option to copy a previous image that has metadata stored. Once you find the image to copy, a new window will pop up asking which sections of the metadata you’ll like to copy. I find this feature handy when I skip around editing different photo sessions or knowing I’ve used the same exact setup from a previous section and use that photo as it’s base point reference of metadata. The Camera Pencil Editing Icon allows you to input all of your Equipment, Film, Developer, and Author information so it can be stored for easy plug-in data input. The idea is to not write out each file with the same data.
Metadata Your Negatives is a part of the process
Amongst adding data to my scanned files, I too organize my images with respective naming conventions on the filenames and folders, so everything is aligned when archiving film. In many aspects I’m sure that whatever information I have from my notebook, aligns to my negatives, to the filename of the scanned file and to the folder directory, so when I do color invert and correct my scans, they are all set to go through an automative process (At least the bulk work).
To be continued…
![]() Any donations are appreciated! It helps keep me going with the craft of photography!
Any donations are appreciated! It helps keep me going with the craft of photography!

